OS X Lion on Gigabyte P55A-UD4P
Greetings all. OS X 10.7 or Lion is out and available on the Mac App Store (MAS). Like it, love it, or loathe it, it is an evolutionary step in the progression of OSX. While the direction Apple is going in, with the new UI can be debated for hours, there is no denying the fact that millions will switch, and this includes some of us with our Hackintoshes as well. Snow leopard was notoriously difficult to get up and running on our Hackies for a long while. Worry not though, here’s a quick and painless way to get Lion up and running on your beige box. The steps below outline the route I took for my Gigabyte P55A-UD4P (F14). YMMV.
What you will need:-
- Lion installation DMG or the App from Mac Apple Store (MAS)
- Chimera or Chameleon RC5
- A spare USB drive or a partition on your HDD to serve as the installation disc (>6GB)
- Existing installation of Snow Leopard (how else would you get the Lion DMG or App?) (>10.6.5)
Step 1: (SL) Extract the InstallESD.dmg from the Lion.app.
I assume you got your copy from the MAS, and not from the “usual sources”. If you did get ti from the usual sources, mount the DMG you “found” and, go to step 2. For all others, within your installation of Snow Leopard, do the following:
- Show Package Contents on Install Mac OS X Lion.app by right clicking on the Lion icon
- In Contents -> Shared Support find InstallESD.dmg
- Mount InstallESD.dmg
Step 2: (SL) Restore the DMG to an installation disk
This step will restore the DMG image on to the USB drive or a partition on your HDD. Be warned, it won’t make this drive or disc bootable, but will copy over all the data required.
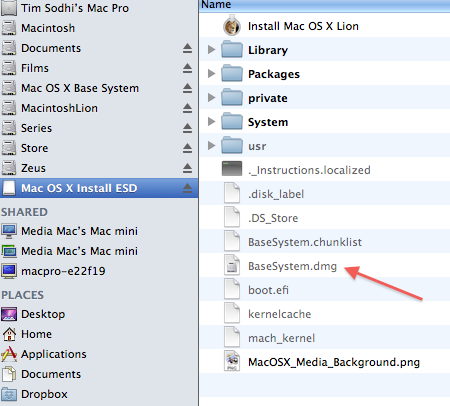
- Find BaseSystem.dmg amongst the hidden files in the InstallESD.dmg. I usually use Pathfinder to view Hidden files.
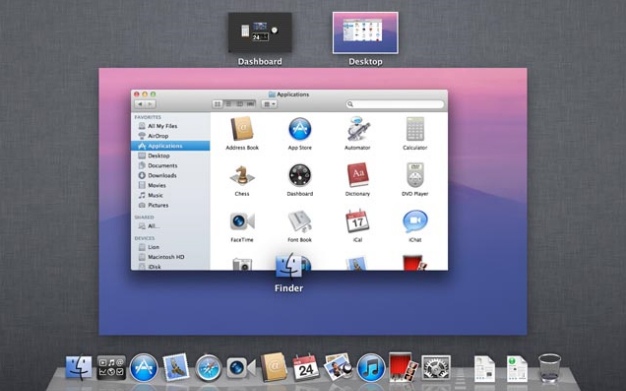
- Mount the BaseSystem.dmg image. (Illustrated below)
- Open Disk Utility and on the left pane, right click the USB drive or the partition you want to designate as the installation drive.
- Click Restore, and as the source, drag the Mac OS X Base System, and in the destination, drag the USB drive or the partition from the left pane. (Illustrated below)
- The process takes ~ 2 minutes.
- Unmount the mounted image from 2. Unmount the Mac OS X Base System with the white drive icon.
- Open Mac OS X Base System that was just created in 5, and navigate to System -> Installation folder.
- Delete the file called Packages.
- From Mac OS X Install ESD copy the folder called Packages to the System -> Installation folder from 7.
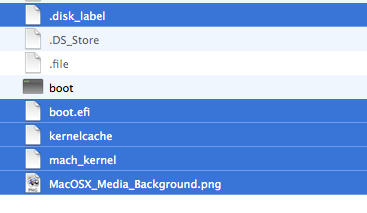
- Copy these five files from Mac OS X Install ESD to Mac OS X Base System:- mach_kernel, .disk_label, boot.efi, kernelcache and MacOSX_Media_Background.png (Illustrated below)
Steps 2.1, 2.2
![]()
After Step 2.2

Step 2.4
Step 2.10
Step 3: (SL) Make the Installation Disk bootable.
Now that the BaseSystem.dmg has been restored to the USB drive or the partition you designated (hereafter referred to, as the installation drive), we need to prep it to boot.
- Install Chameleon RC5 or Chimera (choose your poison) to the newly created Mac OS X Base System partition.
- This will create a new folder called /Extra.
- In /Extra, paste in Extensions folder, com.apple.Boot.plist, DSDT.aml, Extensions.mkext and smbios.plist. You should have these if you are using Snow Leopard on your beige box. If not, you may utilize what I have in mine. Here’s a link.
- Pay special attention to smbios.plist. Make sure you have a serial number in there.
Step 4: (L) Lion Installation
Reboot your box, and press F12 or whichever key combination to bring up the motherboard HDD select screen. Choose to boot from the installation drive. If you’ve done it right, Lion installer should start. Continue on to install Lion by either erasing your Snow Leopard installation, and installing it on that partition, OR install it to a separate partition. If you really don’t care, you can also choose to install it over Snow Leopard. In any case, the installation should go flawlessly.
Step 5: (L) Post installation
On reboot, choose to boot from the installation drive again, but when the Drive selection comes up, choose your new Lion install partition, and boot into Lion.
- Once you’ve logged in, install Chameleon or Chimera on the Lion partition.
- Copy back the Extra folder contents from the Mac OS X Base System installation drive to your Lion Drive Extra folder.
- As an alternative to 2, if you ever did use Multibeast, you can run the installer for Multibeast, much as you would’ve on Snow Leopard.
- Reboot, and profit.
I chose to keep the Mac OS X Base System partition intact, and not delete it, in case I ever need to reinstall Lion from scratch. However, if you are hurting for space, feel free to delete the installation drive from Disk Utility.
The process is very straightforward, and to be honest, I don’t recall it ever being so easy to install the latest OSX version so close to the actual launch of the OS. Whether or not you’d want to, is a completely different question.