AVCHD Editing on Mac revisited
I recently purchased a Panasonic HDC-SD600 camcorder – featuring full HD 1080p recording options and OIS to boot. While I cannot praise the camera enough, the workflow for editing an AVCHD file on a Mac leaves something to be desired. The fact remains that even after nearly four years of widespread AVCHD use, there are “no” editors for OSX that will edit the AVCHD MTS file natively.
I visited this issue a while back, comparing the merits of MJPEG vs AVCHD Lite with regard to editing ease on the Mac, and concluded that MJPEG while inferior in terms of compression, is infinitely better in terms of editing ease. It sparked an interesting debate and a lot of comments from other interested people who have come across the same problem – the cumbersome editing process on a Mac while using AVCHD Lite.
Not having the MJPEG option on this camera, I was determined to figure out a good middle ground for editing the AVCHD MTS files on the Mac without losing quality. Converting the video to a format OSX software can work with is inevitable. What one can try and achieve is the most optimal conversion process so that the end result is spectacular. Here I believe I have a workflow that works quite well, at least for me.
Once again this is very subjective and YMMV. I am trying to stick to the free/near free options for OSX. One could go with Adobe Premiere Pro CS5 and edit the AVCHD files with minimal loss of quality, but that suite is rather expensive and for the casual hobbyist videographer, an overkill. One could also choose Voltaic HD, but I tried the demo from their website, and came out very underwhelmed. Here’s the suite of apps that I use:-
That is all. All editing was done on my mid-2009 iMac with a 3.06 GHz Core2Duo and 4GB RAM. The workflow is really quite simple. Succinctly put, I convert the MTS files to M4V using Handbrake and my custom settings (below). I then import these M4V files into iMovie allowing it to convert the files to MOV and generating thumbnails. Once I edit the movie, I export the same from iMovie using my presets. Couldn’t be simpler. You can click on the images below to view them full-size.
Step 1: Fire Up Handbrake and let ‘er rip!
Choose the file to convert, and then in the Video Tab, choose constant quality with a value of 18-20.
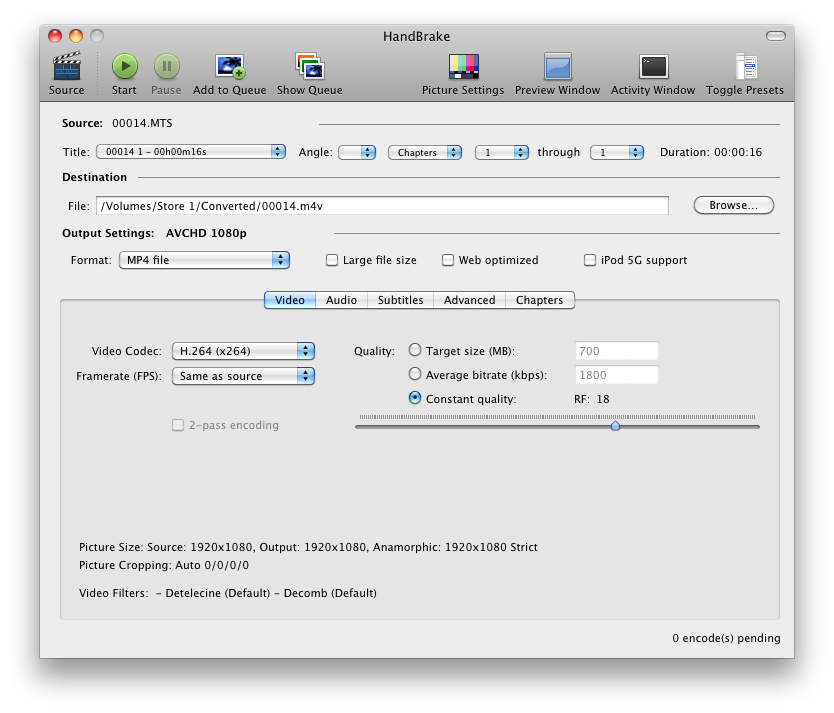
I found that the lower this value is, the better is the quality. The downside to choosing a lower value is the huge file size. So make sure you have HDD room to spare. In my experience, values for Constant Quality < 18 really don't really show any significant improvement, however the file-size is nearly doubled. On a side note, I also tried the constraining by file size and data rate options, but these are just the opposite of what you would want to do, to preserve the quality.
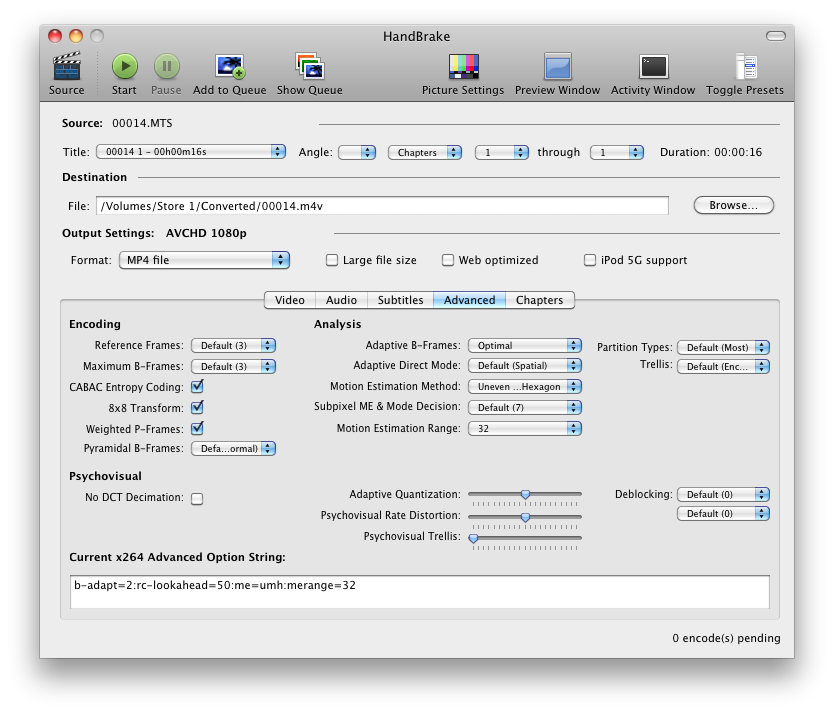
The advanced tab, I keep my values as shown. They are based on a lot of research into what is recommended by the cognoscenti and personal experience as well. Feel free to recommend any alterations.
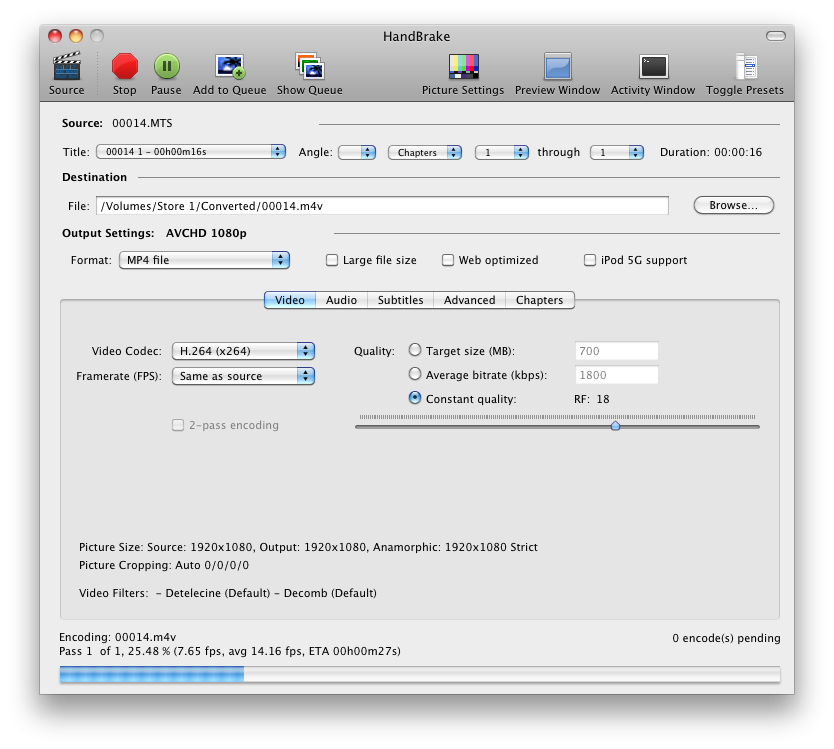
Press the start button, and let Handbrake convert that MTS to M4V for you.
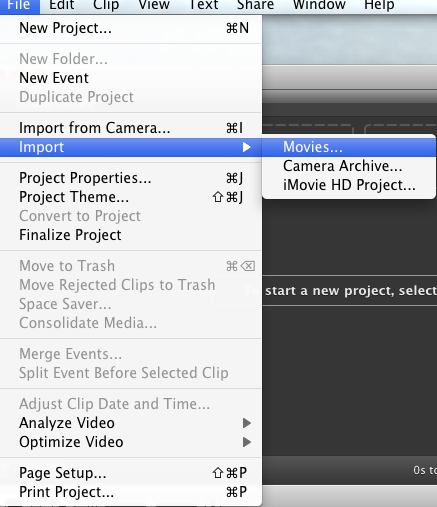
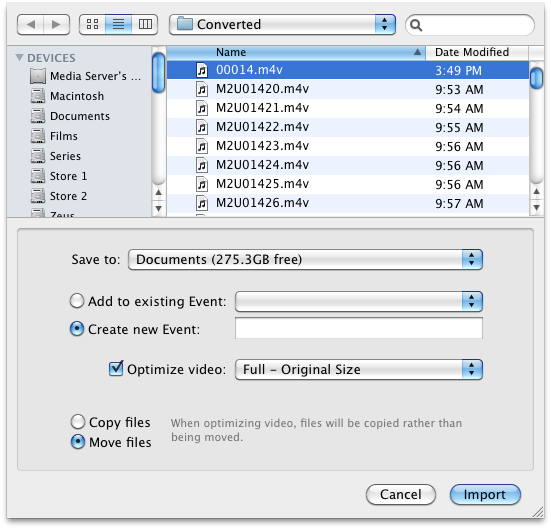
Step 2: Open iMovie and import the movie
Import the M4V you just created with Handbrake to iMovie. Don’t forget to check the “Optimize video: Full – Original Size” option. iMovie will import the M4V file and convert the same into MOV for easier editing. If you didn’t choose the Optimize video option, iMovie would still import the video, but any attempts to edit it, will cause your system to lag. I’ve seen this happen on Core i7s as well.
Once the movie is imported, you can edit it in the timeline view, and to your heart’s content.
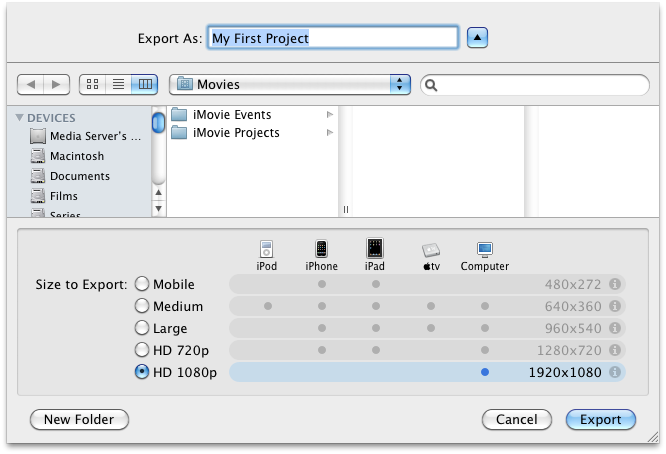
Step 3: Share the movie
From Share, choose Export Movie, -> HD 1080p, press Export and Bob’s your uncle.
Note that there are other ways to import an AVCHD MTS file into iMovie – by connecting your camera and importing directly – but these conversions are very lossy. I compared a movie exported using this method, and the method outlined above, and the difference is more than significant. The picture quality for the Handbrake converted videos is considerably better. It definitely does help to go the extra mile in this case.